Book Review: The Anti-Inflammatory Cookbook 


I’ve already shared a good bit about my history of dealing with chronic pain, but the saying is really true– “You are what you eat” and for many of us,  inflammation can cause problems and symptoms that may be uncomfortable, painful or even unbearable and what we eat can play a significant role in worsening or improving these symptoms.


With The Fast & Fresh Anti–Inflammatory Cookbook, you can continue to enjoy delicious meals with your loved ones, family and friends, while reducing inflammation, becoming pain free and improving your overall health at the same time.

Each of the recipes in this cookbook are made with easy to find fresh ingredients, are simple to prepare, and are either quick to bake, steam or saute, or they make use of a slow cooker, giving you more time to get on with your busy life while dinner’s cooking!

Here’s a “sneak peek” of what you’ll find inside:

  • 150 delicious, mouthwatering recipes including some of my favorites:
    • Sriracha Steak Wraps
    • Spicy Shrimp and Zucchini Noodles
    • Burrito Brunch
  • A 7-Day Meal Plan to start you on your journey to restoring your health
    • Lifestyle planning
    • Morning, Lunch, Dinner, and snack suggestions
  • Comprehensive dietary advice (Food allergies, Gluten Free, Weight-loss/gain, etc.)
  • Guidance to reduce inflammation
    • Including details of various illnesses and diseases and their linkages to inflammation

I think this is a great cookbook and I’m glad I added it to my collection.  I really appreciate the visual appeal of the book and the wealth of knowledge it shares with the reader.

Moreover, the philosophy is really a powerful one– once you take the time to understand the foods that make you feel good and those that flare up your symptoms, you can enjoy more of those healthy foods that help you to feel better, which will help you to manage your weight and your inflammation and symptoms will (hopefully) continue to decrease over time.

Healthy eating, partnered with a good fitness routine and active lifestyle, have been key to managing my chronic pain issues and I’m even more encouraged after reviewing this cookbook!


Disclosure of Material Connection: I received this product in exchange for my honest and unbiased review. I was not required to write a positive review. The opinions I have expressed are my own. I am disclosing this in accordance with the Federal Trade Commission’s 16 CFR, Part 255 : “Guides Concerning the Use of Endorsements and Testimonials in Advertising.”

No Outdoor Grill? No Problem!

I love grilling out, but sometimes inclement weather gets in the way and other times I just don’t want to go outside. I’m just being real– It is way too hot in New Orleans! 😂

In these instances, a well performing indoor grill would be a dream come true. But is the concept TOO GOOD to be true? I had to test it to find out.

Here is my full review:

The Product Features

The grill comes gift boxed and includes a limited 2 year warranty.

Once unboxed, the actual item measures 10 inches across and works on standard electric (but NOT glass top electric), gas, or propane stoves (My home stove uses natural gas).

When in use, the grill’s water-filled outer ring (pictured above) catches fat and juices during cooking, eliminating smoke and splattering.

The cooking surface is made of a high-quality aluminum material and is non-stick to ensures easy cleanup.

My Test Kitchen Review

I decided to use this grill to make chili-lime grilled shrimp with a habanero & honey glaze.

Here are a few step-by-step photos showing the indoor grill in action:

Getting started…


Turning over the first batch…

A close up of a few, freshly glazed shrimp kebabs…

This was a very simple dish. I paired the shrimp with garlic couscous, sweet yellow corn, and sweet peas.

Overall,  I really do like this indoor grill. It was extremely easy to set up and use and came out crystal clean after one dishwasher cycle.

If you’d like to see more physical details, head on over to my YouTube channel and watch my video review!

Guilt Free Pasta

I love pasta!  Especially shrimp pasta!

Sadly, pasta doesn’t love me… 😦  Or my waistline.  So I’ve looked into alternatives. 🙂

Making “zoodles” or zucchini noodles has become a quick and easy solution for my problem and my husboo LOVES them!  He even said he prefers them over traditional noodles!  #SheWon #WifeSkills #WifeyCanBurn 😉

I got the idea for this recipe from SkinnyTaste.  My remixed recipe is below:

Ingredients:

  • 1 1/2 tsps. olive oil
  • McCormick Basil & Garlic Seasoning Blend (Season to taste– approximately 1 1/2 tbsp.)
  • 8 oz peeled and deveined shrimp
  • 2 tbsps. minced garlic (I like A LOT of garlic and purchase it minced.)
  • 1 large zucchini, spiralized
  • 1 lemon (or 6 tbsps. lemon juice)

Directions:

  1. Spiralize the zucchini. Use a large mixing bowl to toss zucchini noodles in 4 tbsp of lemon juice. This will help to keep the noodles from browning. Cover the bowl with plastic wrap and place them in the fridge. (Keep the leftover lemon juice.)
  2. Heat a medium nonstick skillet over medium-high heat.
  3. Add 1 teaspoon of the oil and the shrimp and season with the McCormick Basil & Garlic Seasoning Blend. Cook 2 to 3 minutes.
  4. Add half of the minced garlic and continue cooking 1 more minute, orBasil and Garlic Zoodles on Fix It With Fran 
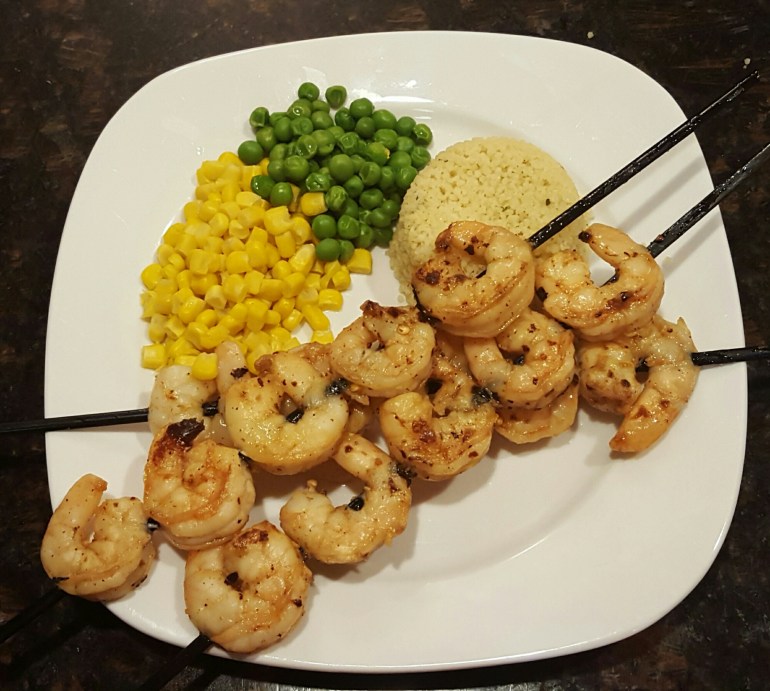
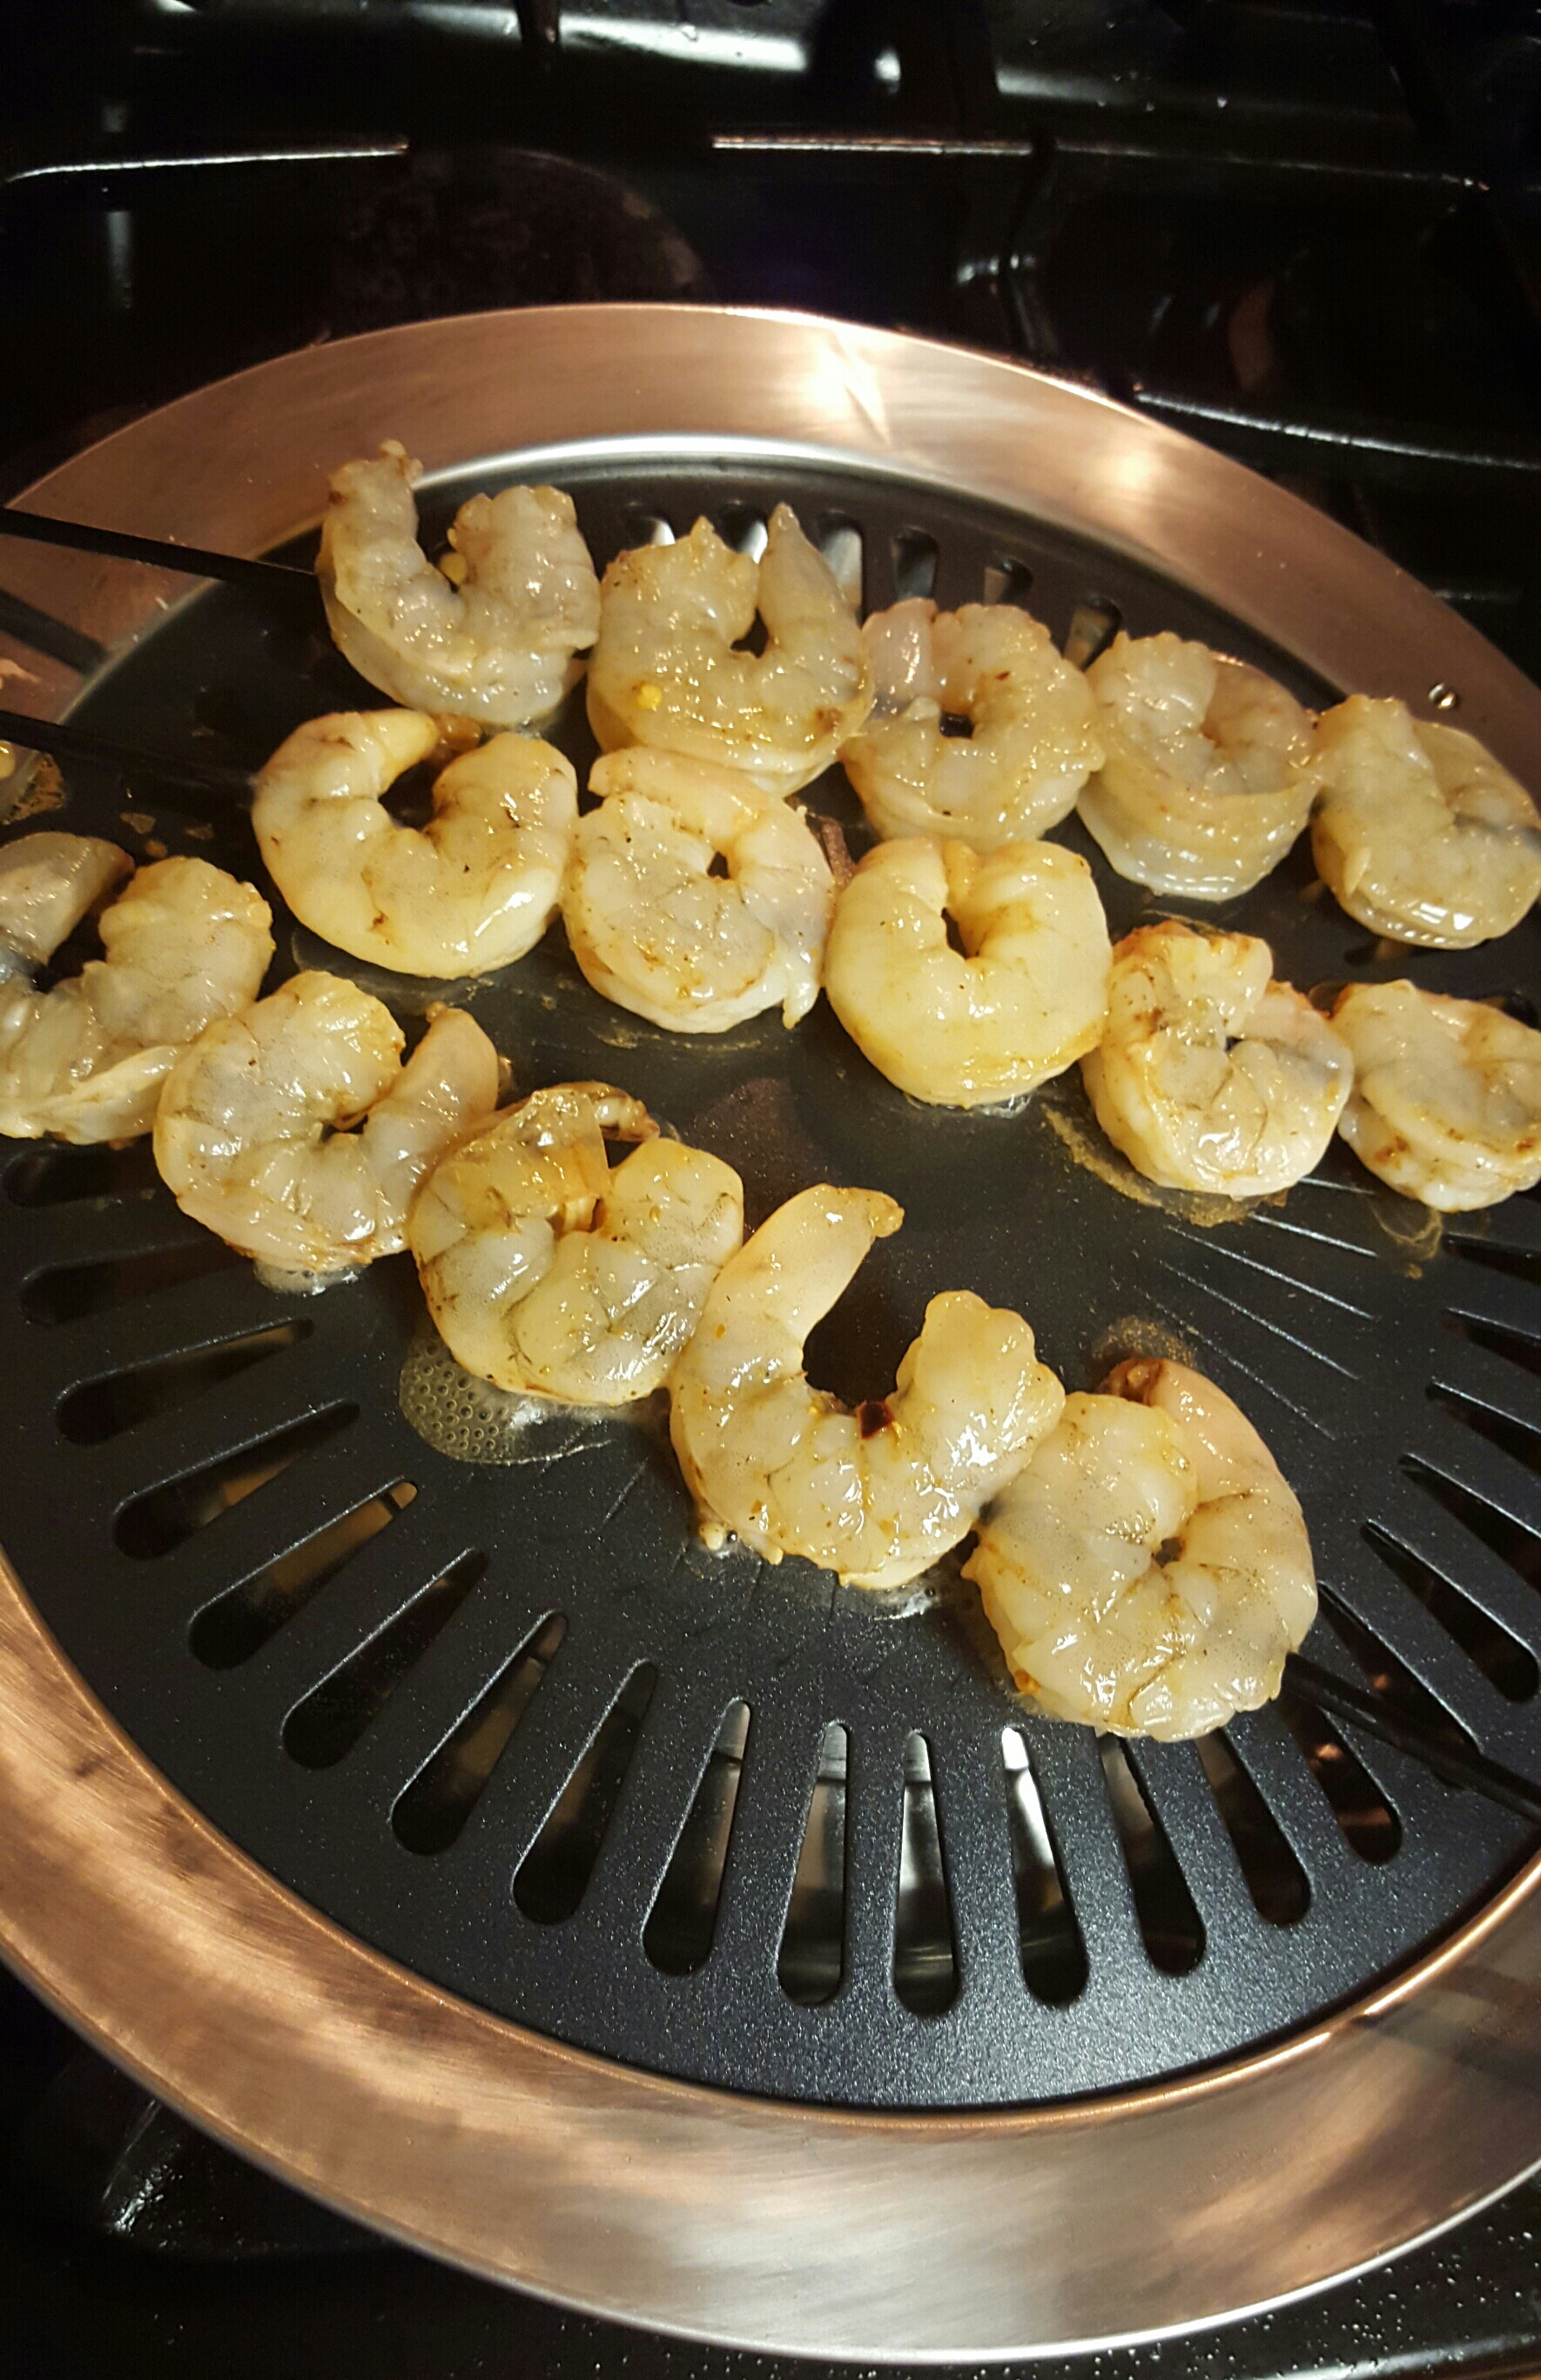
until the shrimp is cooked through and opaque. Set aside on a dish.
  5. Add the remaining 1/2 teaspoon oil and garlic to the pan, cook 30 seconds then add the zucchini noodles and cook 2 minutes or until the zoodles become limp or “al dente.”
  6. Add the shrimp to the pan and squeeze the other lemon half over the dish. Remove from heat and serve. This should be a large enough dish to divide into servings for two people.
  7. Use leftover lemon juice to top off each plated serving. (This final step is optional.)

I used my WonderEsque Tri Blade Compact Spiralizer to make these, most recently. I received the spiralizer as a product review and it is really neat.  It came with its own cleaning brush and is small enough to be stored in a kitchen drawer (unlike my older spiralizers).  You can see more of its features on Amazon.

WonderEsque Tri Blade Compact Spiralizer Review on Fix_It_With_Fran_dot_com

Disclosure of Material Connection: I received this product in exchange for my honest and unbiased review. I was not required to write a positive review. The opinions I have expressed are my own. I am disclosing this in accordance with the Federal Trade Commission’s 16 CFR, Part 255 : “Guides Concerning the Use of Endorsements and Testimonials in Advertising.”

Fran’s Fixings

This week I received my “Frosty Vox Box” from the Influenster Blogging Network.  For full disclosure, I received this for testing purposes from Influenster.  Now that the formalities are out of the way, on to the fixings!

This month, I’ve been working on Operation, “Empty Out the Deep Freezer” and it’s been going rather well.

Last week, I made Vegetable Beef Stew and Pan Seared Steaks.  I had more meals planned, but with holiday parties and sporting events, I ended up only making dinner two nights last week.

So on to this week.  I found some drumsticks in the freezer that I decided to thaw, but then I was thrown a curve-ball when Brandon said he wasn’t in the mood for BBQ chicken…. say what?  How can you not be in the mood for BBQ chicken???

But back to the recipe….

With BBQ out the window I set myself to the task of identifying another recipe to use for the chicken. Thankfully, dark meat is pretty forgiving, so I knew I had that working in my favor.

Then arrives the #FrostyVoxBox.

When I saw the bottle of McCormick Gourmet’s Thyme I knew I found my solution. I’m a big McCormick fan, so I partnered the Thyme with McCormick’s Lemon Pepper grinder and went to work! Here’s photographic evidence:

image

image

My “recipe” was pretty simple. I set the oven at 375°. I didn’t measure the seasoning (gasp). I believe in adding seasoning until it looks right…. AGAIN, chicken is pretty forgiving, so while this may not be the best method, it works. Just make sure you coat each side evenly. I used a vaporizer to apply olive oil to each side, covered my Pyrex dish with aluminum foil then baked the chicken for 30 minutes. Then I removed the foil and baked the chicken for an additional 30 minutes. I served the chicken alongside collards, stovetop stuffing and rice. Nothing fancy.

My final review. Thyme is on my side. YES it is. 🙂 I look forward to using it in more recipes.
image

Now go fix something! 🙂